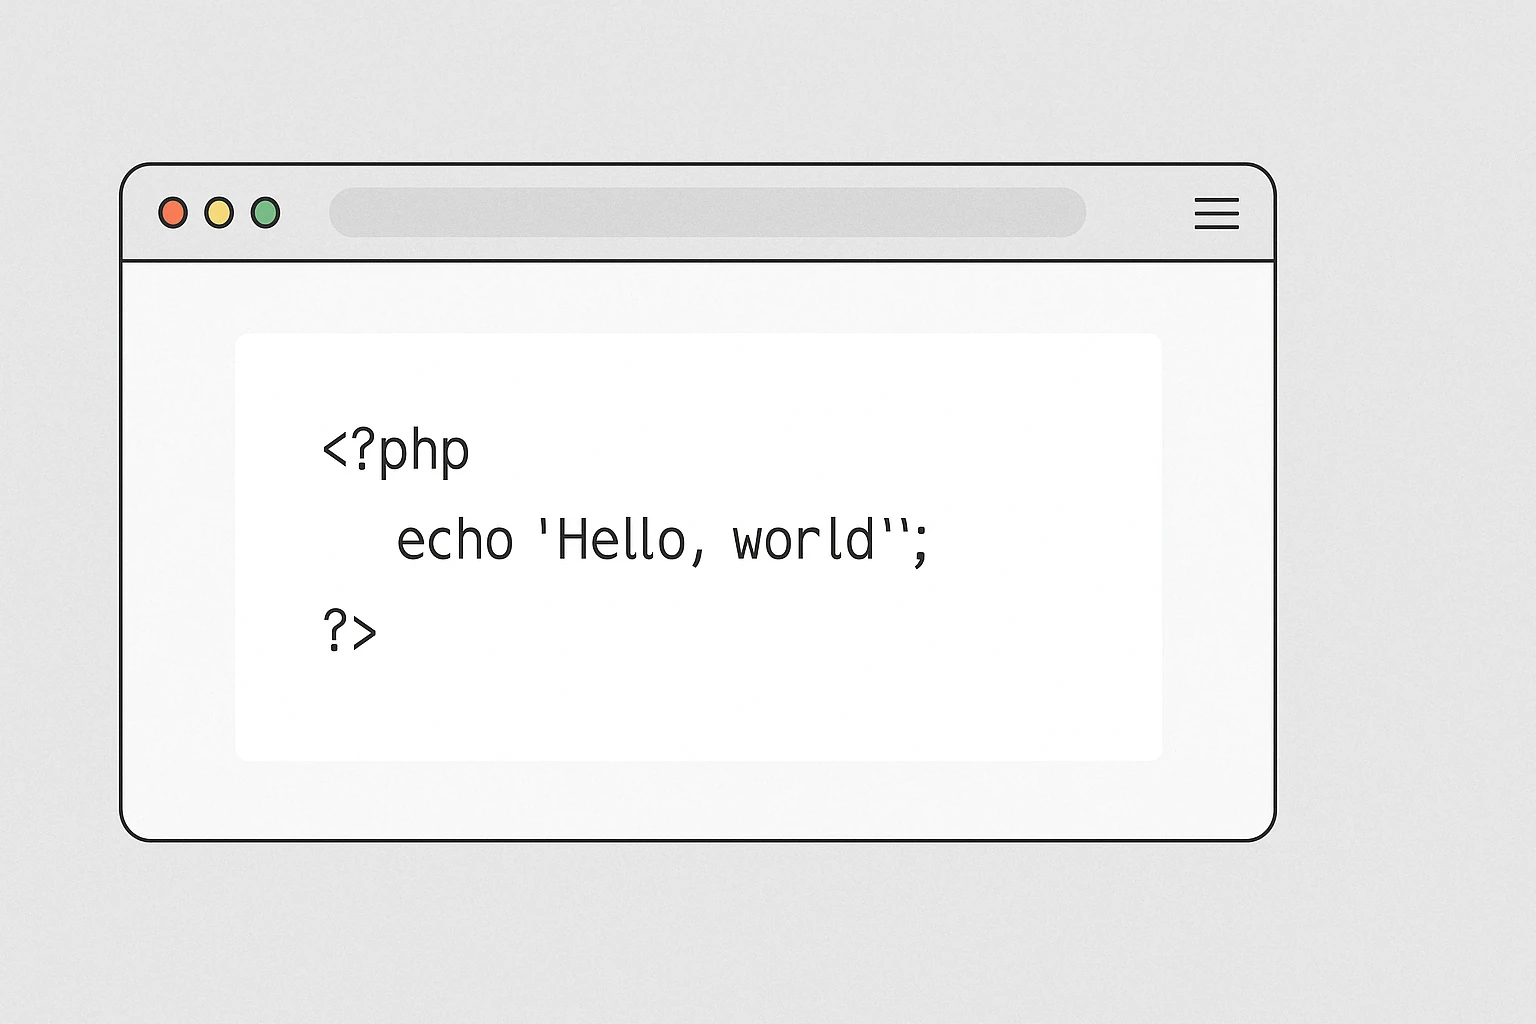
Adding PHP code to WordPress pages can unlock advanced customization, integrate third-party tools, or display dynamic content. However, doing it the wrong way may compromise your website’s security or even break it. In this article, we’ll walk you through safe and effective methods to add PHP code to WordPress, even if you’re not a developer.
Why WordPress doesn’t allow PHP in pages by default
For security reasons, WordPress does not allow direct execution of PHP code inside the page or post editor. This is to prevent any unauthorized or malicious user from injecting code that could compromise the entire site.
The danger of arbitrary PHP
PHP has full access to the file system, database, and WordPress core functions. Therefore, executing unfiltered PHP can:
Execute harmful commands
Steal or modify sensitive data
Delete users or content
Create hidden backdoor access
A real example of dangerous code
Imagine if someone inserts this code inside a page:
<?php
// DANGEROUS EXAMPLE – DO NOT USE
if (isset($_GET['delete_users']) && $_GET['delete_users'] == '1') {
    require_once(ABSPATH . 'wp-admin/includes/user.php');
    $users = get_users();
    foreach ($users as $user) {
        wp_delete_user($user->ID);
    }
    echo "All users have been deleted.";
}
?>
Then visits a URL like:
https://yoursite.com/page/?delete_users=1
The result? All users will be deleted from the site — a disaster.
That’s why WordPress filters PHP
Anything you write in the editor is treated as HTML or shortcode, but not executable code. This is intentional, to protect your site from malicious injections or accidental breakage.
How to run PHP safely
If you need to use PHP in WordPress, use safe and controlled methods such as:
Developing a custom template file or widget
Creating a custom shortcode
Using plugins like Code Snippets
How to safely add PHP code in WordPress
How to safely add PHP in WordPress
Since WordPress does not allow PHP execution directly within posts or pages, it’s essential to use safe, structured methods to customize your website without breaking it. Here’s how to do it the right way.
Method 1: Use the Code Snippets plugin
Code Snippets is a free and highly trusted plugin that lets you add custom PHP code safely through the dashboard.
Example:
function display_welcome_message() {
    echo "<p>Welcome to our website!</p>";
}
add_action('wp_footer', 'display_welcome_message');
This code will show a message in the footer of every page.
Benefits:
No need to edit theme files
Simple, structured interface
Enable or disable snippets at any time
Method 2: Create a custom shortcode
Shortcodes let you execute PHP logic inside posts or pages by typing a keyword in square brackets.
Example:
function current_date_shortcode() {
    return "Today is " . date('F j, Y');
}
add_shortcode('today_date', 'current_date_shortcode');
Insert this in functions.php (preferably in a child theme), and use [today_date] in your content.
Method 3: Add PHP to functions.php (with care)
If you’re comfortable editing your theme files, you can write PHP in functions.php. Always use a child theme to avoid losing changes after an update.
This code injects a custom meta tag into your site’s header.
Where you should not place PHP code
Placing PHP code in the wrong places inside WordPress can lead to critical errors, broken pages, or security vulnerabilities. Let’s look at where you should never insert PHP.
1. Inside the page or post editor
WordPress does not process PHP inserted directly into the block or classic editor. It will either:
Show it as plain text
Or crash the visual layout
Example of what not to do:
<?php echo "Hello world"; ?>
Result: you’ll see the raw code on the page or get a rendering error.
2. In regular text widgets
Default WordPress widgets support HTML and plain text, but not PHP. Inserting PHP there won’t work.
Better alternative:
Use plugins like “PHP Code Widget” or “Code Snippets” to run PHP safely in widgets.
3. In WordPress core files
Never edit:
/wp-config.php
/wp-settings.php
any file inside /wp-includes/ or /wp-admin/
Unless you’re an expert developer, editing these files is a major risk. Updates will override changes, and a single mistake can crash your site completely (white screen of death).
4. In plugin files from other developers
Editing a plugin’s code:
Will break on updates
Can introduce bugs or conflicts
Instead, use hooks, filters, or create your own custom plugin to extend its behavior.
Where to insert PHP safely
In widgets only if PHP execution is enabled
Inside the functions.php file of a child theme
Using the Code Snippets plugin
Through custom shortcodes
Inside custom templates
Alternative plugins for inserting PHP
Besides the popular Code Snippets, there are several other safe and reliable plugins that allow you to add custom PHP code to WordPress without editing your theme files. These are great especially for non-developers.
Here are the top alternatives:
WPCode – Insert Headers and Footers + Custom Code Snippets
A powerful, flexible plugin that lets you:
Add PHP, HTML, JS, or CSS code
Control where and when code runs (site-wide, posts, pages)
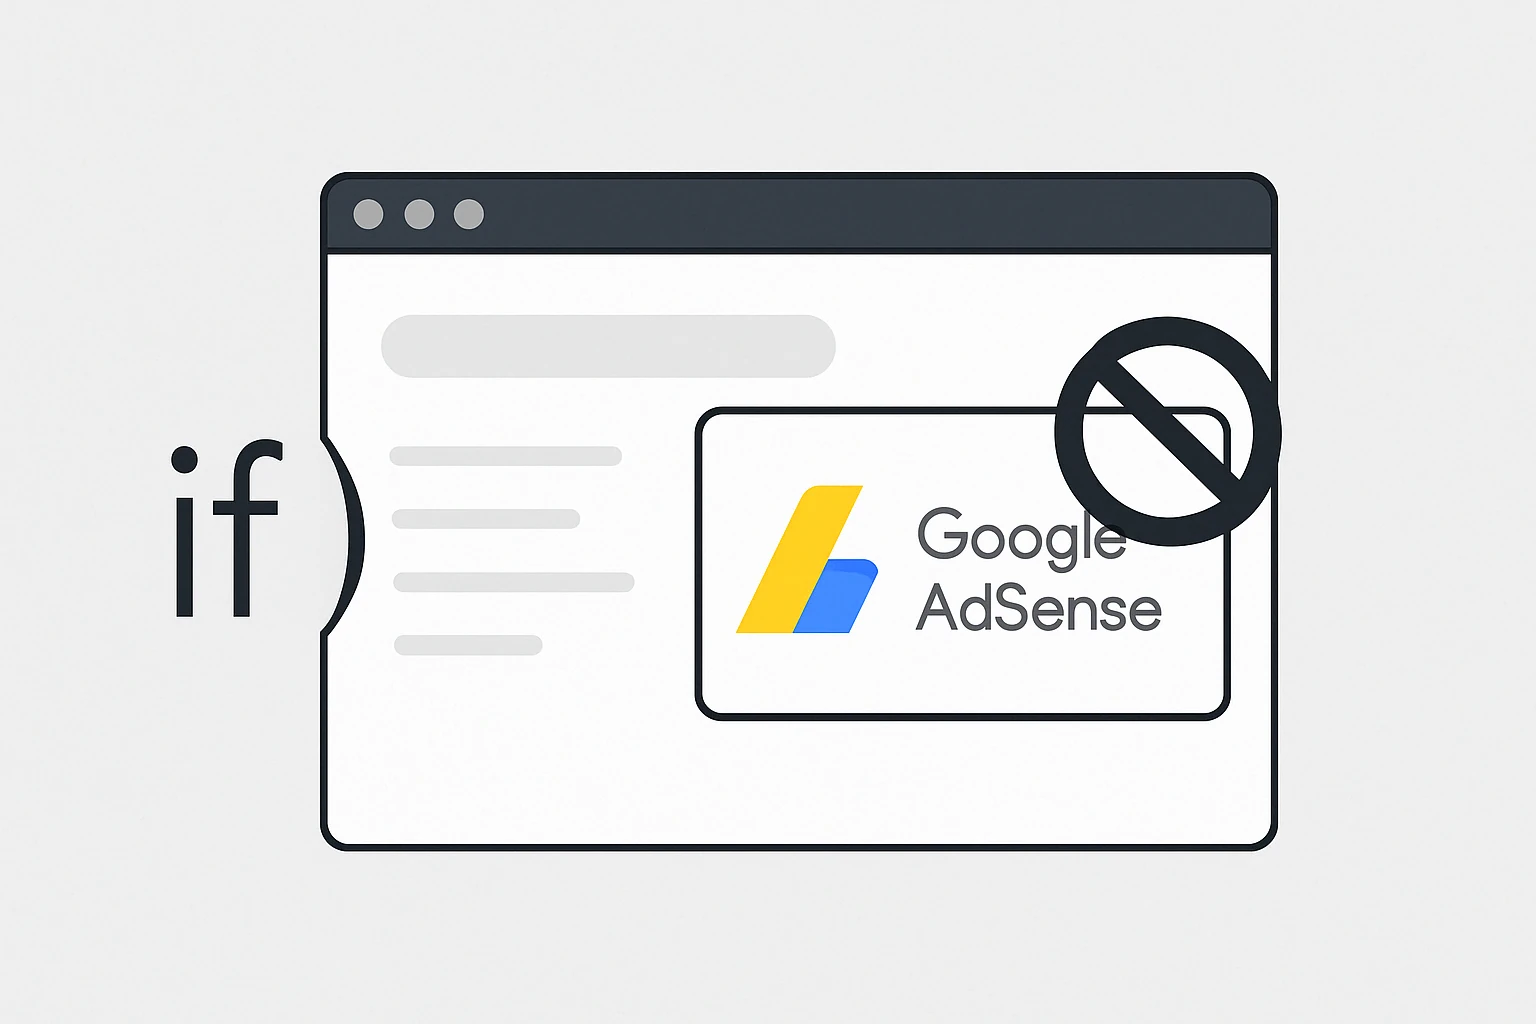
While Google AdSense is a widely used tool for monetizing websites, there are times when it’s useful — or even necessary — to disable AdSense on certain pages. Whether you want to focus user attention, comply with content guidelines, or optimize performance, selectively removing ads is often a smart move.
In this article, we’ll explain how to disable AdSense on individual pages of a standard website and on WordPress, both manually and using plugins.
Why disable AdSense on specific pages
Google AdSense is a powerful monetization tool, but not every page on your website should display ads. In certain cases, keeping pages ad-free enhances user experience, maintains trust, and can even improve your overall revenue strategy. Let’s look at key reasons and examples where it makes sense to disable AdSense.
1. Landing pages with strong calls to action
If a page is designed to convert (e.g., newsletter signup, product purchase, lead capture), ads can distract visitors or drive them away before they complete the desired action.
Example: On a page like /book-a-free-demo, the presence of AdSense may reduce the number of clicks on your “Get started now” button.
2. Premium or high-value content
When you offer in-depth tutorials, white papers, or technical documentation, keeping the content ad-free can signal professionalism and trustworthiness.
Example: An article titled “Enterprise Data Security Strategies 2025” aimed at IT managers is more credible without pop-up ads for unrelated products.
3. Pages with sensitive or policy-risk topics
Some content — though perfectly legal — might fall into AdSense’s gray areas (e.g., health, contests, gambling, CBD). It’s safer to remove ads from these pages to avoid policy violations.
Example: A blog post about “how to run a legal giveaway in Europe” might get flagged by Google even if it’s compliant. Better to exclude ads entirely.
4. Contact, privacy and legal pages
Institutional pages like “Contact Us”, “Privacy Policy”, and “Terms of Service” aren’t meant to generate revenue and should be kept clean and distraction-free.
Example: Ads on a “Meet the Team” or “Legal Notice” page can feel out of place and reduce user trust.
5. Boost page speed and Core Web Vitals
AdSense scripts slow down page loading. On pages where performance is key — such as SEO landing pages or ad campaigns — removing AdSense helps improve speed and UX.
Example: On a product page used for a Google Ads campaign, it’s better to avoid AdSense entirely to maximize conversion ratesand reduce bounce.
Disabling AdSense on static HTML or PHP pages
If your site is not built with WordPress but uses HTML or PHP pages, the simplest way is to not include the AdSense script on pages where you don’t want ads.
If your script is included in a common file like header.php or directly inside <head> or <body>, you can wrap it with a PHP conditional:
<?php
if ($_SERVER['REQUEST_URI'] != '/page-to-exclude.html') {
  include 'adsense-script.php';
}
?>
This will prevent the ad from being rendered on the specified page.
Disabling AdSense in WordPress (manually or with plugins)
If you’re using WordPress, there are several methods to remove AdSense on selected pages.
1. Manual method via theme editing
If you have added AdSense code directly into theme files (e.g., header.php, single.php, or page.php), use WordPress conditional tags:
<?php
if (!is_page('about-us')) {
  // AdSense code here
}
?>
Or by page ID:
if (!is_page(42)) {
  // AdSense code here
}
This is best suited if you only need to exclude a few pages and are comfortable with editing PHP files.
2. Using plugins to manage ads
If you want more flexibility and a no-code solution, use a plugin such as:
Ad Inserter: lets you target or exclude ads by page ID, post type, tag, category, etc.
Advanced Ads: offers granular control including conditions based on URL, device, user roles, and more.
Example with Ad Inserter:
Install the plugin.
Create a new block with your AdSense code.
In the Display Conditions tab, set rules to exclude specific pages.
3. Disabling Google Auto Ads on specific pages
If you use Auto Ads, Google may still place ads where you don’t want them. To fix this:
Log in to your AdSense account.
Go to Ads > By site.
Select your site and click Edit next to “Auto ads”.
Scroll down and exclude specific URLs.
You can also adjust the <script> tag with attributes like data-page-url to influence where Auto Ads appear.
Free consultation with Dopstart
Need help managing AdSense on WordPress or optimizing your ad setup? Dopstart offers a free first consultationand can guide you through every step — from strategy to implementation — ensuring full control over where your ads appear.
FAQ
1. Can I disable AdSense on just one page? Yes, you can use code or a plugin to do this easily.
2. Will I lose revenue if I remove ads from some pages? Only those pages will stop generating revenue; others will continue as usual.
3. Do ad management plugins slow down my site? Not if you use lightweight and well-maintained plugins.
4. Can I hide ads only on mobile or desktop? Yes, advanced plugins allow device-specific rules.
5. Is it against AdSense policy to remove ads? No, as long as you don’t manipulate the code or encourage invalid clicks.
6. Can I limit Auto Ads on specific pages? Yes, directly from your AdSense account settings.
7. Can I show ads only to logged-out users? Yes, with WordPress conditionals or via plugin options.
8. How do I know which pages earn the most? Use Google Analytics and AdSense performance reports per page.
9. Can I run multiple AdSense accounts on one site? No, that’s a violation of Google’s policies.
10. Can Dopstart help me manage AdSense? Yes! We offer a free consultation and hands-on support for WordPress and other platforms.
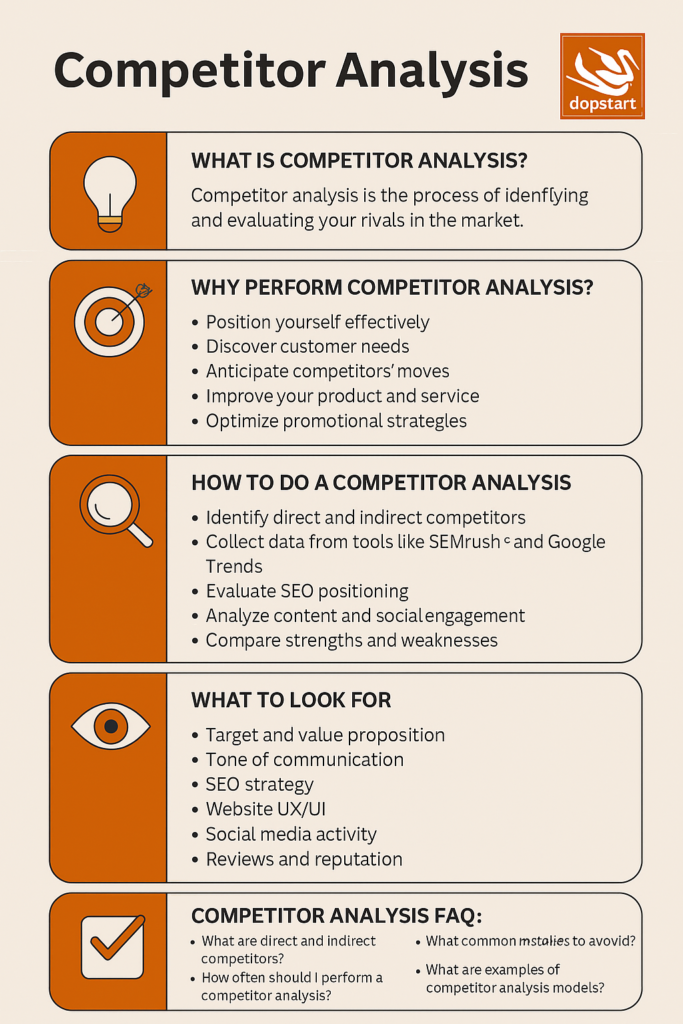
Understanding your rivals is key. This article explores the importance of competitor analysis in digital marketing, outlining strategies, tools, and differences from traditional marketing. You’ll also learn how to do a competitor analysis, what it’s for, and see a practical example to guide your next move.
Let’s start by defining what competitor analysis is. It’s a strategic process of gathering, examining, and interpreting data about your direct and indirect competitors to make better business and communication decisions.
In digital marketing, this means carefully monitoring your competitors’ online activities: the channels they use, the content they publish, their SEO positioning, social media strategies, and more. The goal? Spot untapped opportunities and prepare for rising threats.
What is the purpose of competitor analysis?
What is competitor analysis for? It’s a question every business or digital marketer should ask themselves. The answer is both simple and powerful: competitor analysis helps you better understand the market you’re operating in, so you can act more strategically and with greater confidence.
Without a solid competitor analysis, your marketing efforts can feel like shots in the dark — you might invest in keywords already dominated by large players or communicate with a tone that doesn’t connect with your audience. On the other hand, when done right, competitor analysis reveals new opportunities, shows you how to refine your offer, and helps you position your brand where no one else has gone yet.
Let’s take a closer look at why competitor analysis matters and explore some real-world examples of how it can make a difference.
1. Position yourself more effectively
Competitor analysis allows you to see where you stand in your market and how you can differentiate yourself. For example, if you run a language school and find that your competitors all focus on traditional teaching methods, you could highlight your use of mobile apps and microlearning to attract a younger, more tech-savvy audience.
Example: An online artisanal coffee brand notices that most competitors focus solely on taste. It decides to stand out by emphasizing ethical sourcing and sustainability. As a result, it carves out a unique identity as “the ethical coffee,” attracting a conscious consumer base.
2. Uncover new customer needs
By monitoring your direct and indirect competitors, you can detect emerging customer interests or unmet needs.
Example: A supplement company sees a rival increasingly promoting “mental energy” supplements, not just physical energy. They dig deeper and find a growing demand for cognitive support. This insight leads them to create a new product line focused on brain health and focus.
3. Anticipate your competitors’ moves
A good competitor analysis isn’t just about understanding the present — it’s a way to predict what’s coming next. If you observe patterns like new product launches, rebranding, or sudden ad spikes, you can anticipate your competitors’ next steps and respond before they make an impact.
Example: A fashion e-commerce business sees a competitor heavily promoting second-hand and recycled clothing. It realizes sustainability is becoming a trend and quickly introduces a vintage section on its website — positioning itself as an early adopter before it becomes mainstream.
4. Improve your product or service
Competitor analysis can highlight gaps or weaknesses in your own offer — or areas where your rivals are failing — giving you an edge.
Example: A digital marketing agency notices that customers are complaining about a competitor’s poor communication and delayed reporting. In response, they develop a system that provides clients with real-time dashboards and dedicated account managers — turning a weakness in the market into a selling point.
5. Optimize your marketing strategies
Understanding which channels and messages work for your competitors allows you to refine your marketing investments — focusing on what brings the most ROI.
Example: A cosmetics brand analyzes its competitors and notices Instagram Reels outperform static posts in engagement. Meanwhile, Facebook ads have low interaction rates. Based on this, they shift their strategy to focus more on short-form video content and influencer collaborations on Instagram, while cutting Facebook ad spend.
Seeing your audience through your competitors’ eyes
In short, for an effective competitor analysis, you need to put yourself in the shoes of your audience — and look at your brand through the mirror of your competitors. What are they saying? How are they saying it? What works? What gets ignored?
This isn’t about copying — it’s about understanding and adapting. The goal of competitor analysis is not imitation, but improvement. You use it to carve out your space in the market and develop a voice and strategy that feels authentic — and powerful.
Competitor analysis in marketing vs digital marketing
It’s important to distinguish between competitor analysis in marketing vs digital marketing. In traditional marketing, analysis focuses more on offline elements like pricing, distribution, and physical presence. In digital marketing, it revolves around online visibility, web traffic, content strategies, and audience engagement.
For instance, where traditional marketing might analyze product packaging or store shelf placement, digital competitor analysis investigates SEO rankings, ad campaigns, social media performance, and content tone.
Infographic about Competitor Analysis
How is competitor analysis done?
How is competitor analysis done? It’s not a one-time task, but an ongoing, structured process. It’s essential for anyone who wants to make informed decisions, adapt to changes in the market, and stay ahead of the competition in the world of digital marketing.
Let’s go through each step in detail, with practical examples to show how you can apply these insights to your own business.
1. Identify direct and indirect competitors
The first step is understanding who your real competitors are. Direct competitors offer similar products or services to the same target audience. Indirect competitors satisfy the same need in a different way.
Example: If you run an online yoga course platform, your direct competitors are other online yoga schools. Indirect competitors could include free meditation apps, local gyms offering in-person classes, or even YouTube channels that offer free sessions.
Useful tools:
Google search (check who ranks for your industry keywords)
Google Maps (for local competitors)
Marketplaces like Amazon, Etsy, or Udemy if you sell products or courses
2. Gather data and insights
Once you’ve identified your competitors, it’s time to collect data. There are plenty of tools for this:
SEMrush or SEOZoom: for SEO analysis, keywords, and backlink profiles
SimilarWeb: to estimate traffic sources and audience geography
Google Trends: to track search interest over time
Meta Ads Library: to see current ad campaigns on Facebook and Instagram
Example: You discover that one of your key competitors drives a lot of traffic from LinkedIn, which you’ve never prioritized. That insight could lead you to test content or ads on LinkedIn — a channel you’ve overlooked.
3. Analyze published content
Content is the voice of a brand. Study what your competitors publish on their website, blog, and social media. What topics do they cover? What tone do they use? What format do they prefer — articles, videos, infographics?
Example: A real estate agency notices a competitor regularly publishes bilingual guides for foreign investors — and gets great engagement. This inspires them to create their own bilingual content to attract an international audience they hadn’t focused on before.
Look at:
Content frequency and length
Use of visuals or interactive elements
Engagement levels (comments, shares)
Quality and clarity of calls to action
4. Evaluate SEO positioning
Understanding how your competitors perform in search engines is crucial. Identify what keywords they rank for, which pages bring them the most organic traffic, and how their backlink strategy compares to yours.
Example: You run a nutrition blog and find that a competitor ranks highly for “high-protein breakfasts for athletes.” You haven’t covered this topic yet — now you know what content to develop next to attract that audience.
5. Study ad campaigns and social media engagement
Review your competitors’ ad strategies — what platforms they use, how they communicate, and what offers they promote. Also, analyze how their audience interacts with their social content: comments, likes, shares, and reviews can reveal a lot.
Example: A competitor in the fashion space launches a TikTok campaign featuring micro-influencers and gets tons of visibility. You’ve been focusing only on Facebook, so you decide to test short video content with niche creators on TikTok to explore this new channel.
6. Compare strengths and weaknesses
Finally, take a critical look at your competitors’ strengths and weaknesses — and compare them with your own. Where do they shine? Where are the gaps? What areas are you better in, and where could you improve?
Example: You notice that your competitor has a sleek website, but no transparent pricing. You can turn this into an advantage by adding clear, upfront pricing and service packages on your site — building trust and making conversions easier.
From analysis to action
If you’re wondering how to do a competitor analysis that actually works, here’s the key: you need a method, a critical mindset, and the ability to turn insights into action.
It’s not just about gathering data. For a successful competitor analysis, you have to know how to read between the lines — understand why something works, what’s missing, and how you can offer something better or different.
Only then can you truly improve your positioning, offer more value, and stay competitive in a rapidly evolving market.
Competitor analysis: a practical example
To truly understand how to do a competitor analysis, let’s look at a real-world scenario. Imagine you’re running an e-commerce store that sells natural cosmetics. You want to improve your online visibility, attract new customers, and figure out how your brand compares to the competition.
Here’s a step-by-step breakdown of how to carry out an effective competitor analysis, using the right tools and a strategic approach.
1. Identify competitors
Start by selecting three or four brands that are similar to yours. Focus on direct competitors — other online stores selling natural skincare — but don’t overlook indirect competitors, like vegan or eco-friendly brands mainly distributed through marketplaces or influencer collaborations.
How to do it:
Use Google to search for keywords like “natural skincare online”, “organic face cream”, “clean beauty e-commerce”.
Use SEOZoom or SEMrush to identify which domains rank for your target keywords.
2. SEO analysis: keywords and visibility
Next, dig into SEO data to compare your rankings with those of your competitors.
Using SEOZoom or SEMrush, you discover:
Your site ranks for around 300 keywords and gets about 1,500 monthly organic visits.
One main competitor ranks for 2,300 keywords and gets over 12,000 monthly visits.
A smaller, rising competitor ranks for only 600 keywords but is winning long-tail searches like “hydrating organic cream for sensitive skin” — terms with strong purchase intent.
This insight shows you that ranking for specific, less competitive keywords can be more effective than trying to dominate broad, high-volume terms.
3. Traffic sources and performance
With SimilarWeb, you assess where your competitors’ traffic is coming from.
You find that:
65% of your traffic comes from organic search, with 20% from social and the rest from direct or referral.
A competitor gets 35% of their traffic from Instagram, likely due to influencer campaigns or viral content.
Another brand gets strong traffic from email, showing a successful newsletter strategy.
Based on this, you realize you could boost your social strategy on Instagram and invest in email marketing to increase customer retention.
4. Content and social media analysis
Now look at the content your competitors publish, both on their websites and social platforms. Evaluate:
The tone of voice: You notice that their tone is more casual and conversational, while yours is more formal and technical.
Posting frequency: Top brands post 3–4 times a week on Instagram and update their blog at least twice a month.
Content types: Stories, reels, how-to videos, user reviews, educational content like “how to use hyaluronic acid.”
Practical example: A competitor has a weekly Monday series with seasonal beauty tips, generating high engagement. You could adapt this idea into a “Weekly Natural Skincare Routine” series tailored to your products — driving consistency and connection with your audience.
5. Engagement and audience interaction
Next, focus on engagement metrics — how their audience reacts and participates.
You observe that:
Your posts get minimal comments, while competitors regularly start conversations and Q&As.
They use Instagram Stories with polls, quizzes, and “ask me anything” boxes to increase participation.
Users tag the brand in their posts often, encouraged by reposts, giveaways, or branded hashtags.
This inspires you to strengthen your community engagement. You could introduce a branded hashtag, repost user-generated content, and invite customer feedback to build loyalty and visibility.
Final thoughts: from insight to action
This practical example of competitor analysis proves that with a structured approach and the right tools, you can gain valuable insights that directly influence your strategy.
It helps you:
Spot content and keyword opportunities
Identify areas where your brand can improve
Understand your audience’s behavior through your competitors
Inspire campaigns based on what’s already working — with your own unique twist
An ongoing, detailed competitor analysis isn’t just a benchmarking exercise — it becomes a real engine for strategic growth.
Competitor analysis: what to look for
When conducting a solid competitor analysis, it’s important to look beyond the numbers. It’s not just about how many visitors a website gets, how many followers a brand has, or how many keywords they rank for. What really matters is understanding the why behind every strategy: what’s working, why it works, who it targets, and how you can position yourself differently or more effectively.
Let’s break down the key areas to focus on during your competitor analysis, with real-life examples.
1. Target audience and value proposition
Who are your competitors speaking to? What problems are they solving? What’s their core message? By analyzing their target audience and value proposition, you can determine whether you’re addressing the same audience — and whether your message hits the mark.
Example: Two brands sell natural cosmetics. One targets eco-conscious millennials, using playful, minimalist packaging and affordable pricing. The other speaks to women over 40 who seek high-quality, premium ingredients, using elegant branding and scientific claims. Understanding this difference helps you refine your tone, offer, and visuals to avoid wasting resources targeting the wrong segment.
2. Brand tone and communication style
Tone of voice is a key element in any digital strategy. It might be friendly, formal, witty, empathetic, or technical — and it needs to be consistent and aligned with your brand’s identity.
Example: You’re analyzing a competitor in the insurance industry and notice they use a clear, simple, and reassuring tone. They use metaphors like “a safety net for life’s surprises” and a direct call to action. Your own communication, meanwhile, is too bureaucratic. This insight pushes you to explore a more human, approachable tone to build trust and clarity.
3. SEO strategy: keywords and backlinks
A major component of competitor analysis is understanding their SEO. What keywords do they rank for? What type of content helps them rank? What’s the quality and source of their backlinks?
Example: A competitor ranks highly for specific long-tail keywords like “aloe vera cleanser for oily skin”, while your blog posts are more generic. This suggests an opportunity to target more specific search intents that may lead to higher conversion rates.
You also find that they’re getting backlinks from high-authority sites like Vogue or Green Matters, likely through digital PR campaigns or guest blogging. This points you toward building a stronger outreach and backlink strategy.
4. Website UX/UI
A good-looking website isn’t enough — it also needs to be easy to navigate, fast, and conversion-friendly. During your competitor audit, review the user experience (UX) and interface (UI) of their website.
Example: You explore a competitor’s homepage and see that it has a clean layout, a clear CTA (“Start your free trial”), and smooth scrolling. Your own homepage, in comparison, is cluttered, lacks a clear CTA, and makes it hard to find product info. This gives you direction for a UI/UX redesign focused on simplicity and action.
5. Social media activity
Social media isn’t just about posting — it’s about building connection and brand personality. Look at your competitors’ posting frequency, content formats, and engagement quality.
Example: A competitor posts consistently with a mix of Instagram Reels, user testimonials, weekly themes, and polls. You, on the other hand, post irregularly with mostly static images. The difference is clear — and it tells you it’s time to rethink your content strategy, introducing dynamic formats and community interaction.
6. Online reviews and brand reputation
Reviews are the most direct feedback from real users — a goldmine of insight. Look at what customers say on Google, Trustpilot, social media, or ecommerce platforms.
Example: A competitor gets glowing reviews for fast shipping but recurring complaints about customer support. You know your support team is one of your strengths, but you haven’t showcased that in your messaging. This is a cue to leverage and highlight your strengths, while identifying areas to improve based on customer feedback in your niche.
The importance of qualitative analysis
A valuable competitor analysis blends data with critical thinking. It’s not just charts and rankings — it’s about understanding why certain strategies work, how they resonate with the audience, and where you can step in with something smarter or more meaningful.
Observation isn’t imitation. The goal is to learn, adapt, and differentiate. Your competitors can be your best teachers — if you’re willing to look deeper than just numbers.
What model to use for competitor analysis
Several frameworks can support competitor analysis. The SWOT analysis is widely used to identify Strengths, Weaknesses, Opportunities, and Threats. Porter’s Five Forces model is helpful to assess competitive pressure within your market.
So, what model to use for competitor analysis depends on your goals. For SEO, keyword comparisons work best. For branding, focus on tone, voice, and visual elements.
How to analyze competitors
Here’s a summary of how to analyze competitors:
Define your analysis goals
Choose relevant competitors
Collect strategic data
Compare performance indicators
Create a report and extract action points
With the right tools and mindset, you can anticipate your rivals’ next move and carve out a unique market position.
Competitor Analysis Checklist
Identifying competitors
I’ve identified 3–5 direct competitors
I’ve identified potential indirect competitors
I’ve checked their Google search rankings for key terms
SEO and visibility analysis
I’ve compared their ranked keywords
I’ve analyzed their estimated organic traffic
I’ve reviewed their backlink structure
I’ve spotted niche keywords I could target
Content strategy and tone of voice
I’ve reviewed blog and article topics
I’ve assessed content frequency and quality
I’ve identified their tone of communication
I’ve noted any strong calls to action
Website UX/UI
Their website is fast and mobile-optimized
Navigation is clear and intuitive
The purchase or contact flow is easy and visible
Key info is easy to find
Social media and ads
I’ve checked which social platforms they’re active on
I’ve observed their content formats (reels, stories, live, posts)
I’ve evaluated their engagement level (likes, comments, shares)
I’ve reviewed their ad campaigns via Meta Ads Library or similar tools
Online reputation
I’ve read customer reviews
I’ve identified their strengths and weaknesses from user feedback
I’ve checked for loyalty strategies (newsletters, promos, support)
What is competitor analysis? It’s the process of studying your competitors to improve your strategy.
What is the purpose of competitor analysis? To understand your market and strengthen your position.
Which tools are used for competitor analysis? SEMrush, SEOZoom, SimilarWeb, Ubersuggest, Google Trends.
How do I identify direct and indirect competitors? Direct ones sell similar products to the same audience; indirect ones solve the same need differently.
How can I do an effective competitor analysis? Define goals, collect data, analyze patterns, and take action.
What’s the difference between traditional and digital competitor analysis? Digital focuses on online performance and behavior; traditional on physical presence and pricing.
What should I analyze in competitor content? Frequency, quality, engagement, tone, and visual style.
How often should I analyze competitors? Every few months or before launching new initiatives.
Which model should I use for analysis? SWOT and Porter’s Five Forces are common and effective.
What’s the biggest benefit of competitor analysis? Discovering what works (or doesn’t) so you can improve and grow faster.
Google Search Console is an essential tool for monitoring and optimizing your site’s visibility in Google’s search results. If you have a blog on Google Blogger and want to connect it to Google Search Console, it’s important to set up the connection correctly to take advantage of all the platform’s features. This article will guide you through the process of connecting your Blogger site to Google Search Console, whether you’re using a custom domain (e.g., www.yoursite.com) or sticking with Blogger’s default domain (e.g., yoursite.blogspot.com).
Connecting Blogger to Google Search Console Without a Custom Domain
If you prefer not to use a custom domain and continue using Blogger’s default domain (such as yoursite.blogspot.com), the process of adding your site to Google Search Console is very straightforward. In this case, you won’t need to worry about configuring DNS records, as Blogger automatically handles the domain for you.
Log in to Google Search Console and click on “Add a Property.”
Enter the full URL of your blog, including the https:// prefix (e.g., https://yoursite.blogspot.com).
Google will provide you with several verification methods. The simplest method is the HTML method, which allows you to add a verification tag directly in your Blogger settings.
To use the HTML method:
Copy the verification code provided by Google.
Go to Blogger, access the Settings of your blog, and select “Search Preferences.”
In the “Site Verification” section, paste the HTML verification tag and save your changes.
Once the verification is complete, you’ll be able to start monitoring your blog’s performance in Google Search Console.
Connecting Blogger to Google Search Console With a Custom Domain
If you want to use a custom domain (such as www.yoursite.com) for your Blogger blog, the process is slightly more involved but allows you to have a more professional-looking address. This will help improve your site’s credibility and make it appear more trustworthy. Let’s walk through how to configure your domain, set up DNS records, and add your site to Google Search Console.
1. Purchase the Custom Domain
The first step is to purchase a custom domain from a domain provider like GoDaddy, Namecheap, Google Domains, or any other similar service. Once you’ve purchased the domain, you need to configure it to point to your Blogger blog.
For example:
Let’s say you want to use the domain www.yoursite.com.
2. Set Up the Domain on Blogger
Once you’ve purchased your custom domain, you need to configure it on Blogger. Here’s how:
Log into Blogger and go to the Settings section of your blog.
Under the “Blog Address” section, enter your custom domain, such as www.yoursite.com.
Blogger will provide you with two critical pieces of information for configuring DNS records: a CNAME record and an A record.
3. Configure the DNS Records
Log into your domain provider’s control panel (e.g., GoDaddy, Namecheap, etc.) and modify the DNS settings for your domain. You need to add the following records:
CNAME Record
This record points your domain to Blogger. Blogger will give you a CNAME address, which will look something like this:
Name (Host):www
Value (Destination):ghs.google.com
Add a CNAME record for your domain where www points to ghs.google.com.
A Record
Blogger also requires you to add an A record to ensure your domain works correctly even without the “www” prefix (for example, yoursite.com without the www). The A records you need to add are:
Name (Host): @
Value (Destination):216.239.32.21
Value (Destination):216.239.34.21
Value (Destination):216.239.36.21
Value (Destination):216.239.38.21
These addresses are Google’s servers for Blogger. When you add these records, your domain will be properly set up to point to your blog on Blogger.
Example DNS Configuration:
CNAME Record:
Name: www
Destination: ghs.google.com
A Record:
Name: @
Destination: 216.239.32.21
Destination: 216.239.34.21
Destination: 216.239.36.21
Destination: 216.239.38.21
After adding these records, save your changes in the control panel of your domain provider. It may take several hours for DNS changes to propagate, so be sure to wait the necessary time for the changes to take effect.
4. Add the Site to Google Search Console
Once your domain is correctly set up on Blogger, you can proceed to link it to Google Search Console to monitor the site’s performance. Here’s how:
Go to Google Search Console and click on “Add Property.”
Enter the full URL of your site, e.g., https://www.yoursite.com.
Select the DNS verification method. Google will provide a TXT record that you need to add to your domain’s DNS settings. This TXT record will look something like this:iniCopiagoogle-site-verification=xyz123abc456
Go back to your domain provider’s control panel and add the TXT record to your domain’s DNS settings.Example of TXT Record:
Name: @
Value:google-site-verification=xyz123abc456
After adding the TXT record, return to Google Search Console and click “Verify.” If everything is configured correctly, Google Search Console will confirm the verification of your site.
5. Monitor and Optimize with Google Search Console
After successfully verifying your site, you can start monitoring its performance via Google Search Console. The platform will provide you with useful data, such as:
Keywords that drive traffic to your blog.
Impressions and clicks for each page.
Indexing errors to fix.
Backlinks pointing to your site.
Suggestions for optimizing content.
Additionally, using Google Search Console, you can receive alerts about potential SEO issues, such as 404 errors, mobile-friendliness problems, or site speed issues.
Monitoring and Optimizing the Site with Google Search Console
Once your blog is connected to Google Search Console, you can start monitoring various aspects of your site’s performance. Search Console gives you detailed insights into how your site appears in Google search results, highlighting the keywords that bring traffic and any potential indexing issues.
Additionally, you’ll be able to analyze data such as clicks, impressions, and CTR (click-through rate), identifying the most visited pages and those that need optimization. By using Google Search Console data, you can improve your site in various ways, such as optimizing meta descriptions, including the right keywords, and fixing any 404 errors.
Conclusion
Connecting your Blogger blog to Google Search Console is a crucial step for improving your site’s visibility, whether you’re using a custom domain or not. With access to Search Console, you’ll have the tools necessary to monitor your site’s traffic, identify issues, and optimize your site’s position on Google. Use this data to continually improve your site and increase its online presence.
FAQ
Can I connect my Blogger site to Google Search Console without a custom domain? Yes, you can do so using Blogger’s default domain (e.g., yoursite.blogspot.com).
How do I add my blog to Google Search Console? Simply log into Search Console, add your blog’s URL, and choose a verification method.
How do I verify my blog’s ownership on Search Console? You can use the HTML method or the DNS method, depending on whether you have a custom domain.
What should I do if the site verification fails? Check that the verification code has been correctly added to your Blogger settings or DNS.
Can I use Google Search Console if I don’t have a custom domain? Yes, you can use Search Console with Blogger’s default domain.
What are DNS records and how do I configure them? DNS records are settings that ensure your domain points to your blog on Blogger. You’ll need to configure CNAME and A records in your domain provider’s panel.
Why is it important to connect Blogger to Google Search Console? Google Search Console allows you to monitor your site’s performance and optimize its visibility in search results.
How can I improve my blog using Search Console? You can analyze keywords, optimize meta descriptions, and fix indexing issues.
Can I use Search Console with other CMS platforms besides Blogger? Yes, Search Console works with any website, not just Blogger.
Is Google Search Console free? Yes, Google Search Console is a free tool offered by Google.
Our SEO Agency rarely has requests to optimize sites made with Google Blogger. However, it has happened that some clients have made a personal blog and asked for some suggestions for SEO optimization. It is our pleasure to share the advice that we usually give in these cases.
In this article, you’ll learn how to do SEO on Blogger, Google’s free blogging platform. Whether you’re using a blogspot.com domain or a custom domain, there are several strategies you can apply to improve your blog’s search engine ranking. Although it has more limitations compared to WordPress, Blogger still offers a good degree of SEO optimization, if you know where to focus your efforts.
We’ll explore how to set up the blog correctly, optimize content, structure your pages, and use available tools to achieve real results — even on a basic platform like Blogger.
When creating a blog on Blogger, Google assigns a free subdomain like yourblog.blogspot.com. Alternatively, you can purchase a second-level domain (e.g. yourblog.com) and connect it to your blog.
From an SEO perspective, there’s no penalty for using the blogspot domain. However, a custom domain offers several advantages: it enhances authority, supports branding, and gives you greater flexibility for future projects. Also, a dedicated domain tends to perform better in search results over time.
How to set up SEO on Blogger
Even though Blogger offers fewer features than other CMS platforms, it still allows you to implement solid on-page SEO strategies. With the right configuration, you can significantly improve your blog’s visibility on search engines.
Let’s break it down with practical examples and some HTML where needed.
Enable search descriptions (meta description)
To add a custom meta description for each post (which is crucial for SEO), you first need to enable the feature in the settings.
Steps:
Go to Settings > Meta tags.
Enable the option “Enable search description”.
Save the settings.
Now, when you create or edit a post, you’ll see a field on the right side of the editor called Search Description — this is where you enter a custom SEO-friendly snippet for that specific post.
Example of an effective meta description:
Learn how to optimize your Blogger site for SEO, boost your Google rankings, and grow your organic traffic with easy, actionable tips.
Set a clean, SEO-friendly permalink structure
When publishing a post, Blogger lets you choose between an automatic permalink and a custom permalink. Always go with the custom one to control your blog post URL.
How to do it:
In the post editor, click on Permalink (right side).
Select Custom permalink.
Write a short, keyword-rich, clean URL.
Example:
For a post titled “How to Do SEO on Blogger”, avoid:
Remove unnecessary stop words like “the”, “and”, “on”.
Include your main keywords.
Customize homepage title and description with HTML
Blogger doesn’t give you direct control over the homepage meta title and description. However, by editing your theme’s HTML, you can manually define them using conditional logic.
Example: Add this in the <head> section of your theme:
<b:if cond='data:blog.pageType == "index"'> <title>SEO Blogger Guide | Boost Your Rankings</title> <meta name="description" content="Learn how to do SEO on Blogger with this complete guide. Optimize your content, structure, and performance easily."/> </b:if>
This code ensures your homepage has a unique title and meta description, while Blogger auto-generates tags for individual posts and pages (if search descriptions are enabled).
Use H2 and H3 headings to structure content
Clear content hierarchy helps readers and search engines understand your content. Blogger assigns H1 to your post title automatically, so you should use H2 and H3 inside the post to organize content.
Example structure:
<h2>Setting up Meta Tags in Blogger</h2>
<p>To improve SEO, it’s essential to set up custom meta tags for your blog...</p>

<h3>How to enable search descriptions</h3>
<p>Go to your blog settings and toggle the meta tag option...</p>

<h2>Creating SEO-friendly URLs</h2>
<p>URLs should be short, descriptive, and contain your focus keywords...</p>
Best practices:
Only one H1 per page (Blogger handles this).
Don’t skip heading levels (use H2 before H3).
Include keywords naturally in headings for better SEO relevance.
Bonus: Add structured data with Schema.org (JSON-LD)
While Blogger doesn’t support plugins for rich snippets, you can manually add structured data in JSON-LD format to your blog posts via the HTML theme editor.
Example: Basic JSON-LD for a blog post
<script type="application/ld+json">
{
  "@context": "https://schema.org",
  "@type": "BlogPosting",
  "headline": "How to Do SEO on Blogger",
  "description": "Complete SEO guide for Blogger: meta tags, permalinks, headings, and content optimization.",
  "author": {
    "@type": "Person",
    "name": "Your Name"
  },
  "publisher": {
    "@type": "Organization",
    "name": "Your Blog",
    "logo": {
      "@type": "ImageObject",
      "url": "https://www.yoursite.com/logo.png"
    }
  },
  "datePublished": "2025-03-24"
}
</script>
You can add this to the <head> section of your blog template or inside a specific post using the HTML view.
Optimizing content for search engines
Great SEO on Blogger still revolves around quality content. Write well-structured, original, and informative posts. Include keywords naturally in titles, subheadings, and throughout the text. Keep your writing style clear, engaging, and user-focused.
Also remember to:
Optimize images with descriptive file names and alt text.
Link to other posts on your blog to build a strong internal linking structure.
Improve readability with short paragraphs and clear formatting.
The importance of the robots.txt file and the sitemap on Blogger
Why are they important?
The robots.txt file tells search engine crawlers which parts of your site they are allowed to access or should avoid. It helps prevent indexing of duplicate or irrelevant content.
The sitemap is a file that lists the URLs of your blog posts and pages, helping Google and other search engines discover and index your content more efficiently.
Blogger allows you to customize both of these elements directly from your dashboard — a key feature for improving your technical SEO.
How to enable and customize robots.txt and sitemap in Blogger
Enable advanced SEO settings
Go to:
Settings > Crawlers and indexing > Enable custom robots.txt
Here, you can:
Enable the custom robots.txt file
Enable custom robot header tags
Once enabled, you’ll be able to add your custom rules in a text box.
Once enabled, check the appropriate boxes depending on the page type.
Connect your blog to Google Search Console
One of the most important steps is linking your blog to Google Search Console, the official tool for monitoring your site’s presence in search results. It allows you to:
Check if your posts are indexed.
Identify SEO errors.
Submit your sitemap.
Monitor organic traffic and popular queries.
This step is crucial for both blogspot and custom domains.
Mobile-first and loading speed
Blogger provides mobile-ready templates, but you should still verify if your blog is truly mobile-friendly. Google prioritizes responsive and fast-loading sites, so choose lightweight, clean templates.
Compress large images and limit the use of external scripts. Use tools like PageSpeed Insights to test and improve your site’s performance.
Link building and domain authority
Even on Blogger, you can work on link building, meaning getting other sites to link back to your blog. Some strategies include:
Guest posting on related blogs.
Sharing content on social media.
Leaving valuable comments on relevant websites.
The more quality backlinks you get, the higher your domain authority, and the better your SEO ranking can become.
Blogger SEO: limitations and alternatives
Although Blogger is great for beginners or simple blogs, it has some limitations: fewer customization options, limited control over hosting, and no access to SEO plugins.
If your blog grows or your needs become more advanced, consider switching to WordPress.org, which gives you much more flexibility and SEO control.
Conclusion
Doing SEO on Blogger is totally possible, despite some limitations. With proper setup, strong content, technical optimization, and a consistent link-building strategy, even a blogspot domain can perform well on search engines.
The key is to treat your Blogger blog with the same care you’d give to a more advanced site. Every detail matters — even on a simple platform.
Frequently Asked Questions (FAQ)
1. Is Blogger good for SEO? Yes, with the right strategies you can rank well even on Blogger.
2. Should I use blogspot or a custom domain? A custom domain gives more SEO and branding benefits over time.
3. How do I add meta descriptions in Blogger? Enable “search description” and write one for each post in the post editor.
4. Can I use Google Analytics on Blogger? Yes, just paste your tracking ID into the theme HTML.
5. Do I need to create a sitemap manually? No, Blogger generates it automatically, but you can customize it.
6. Can I edit the robots.txt file? Yes, Blogger allows you to write a custom robots.txt.
7. What tools should I use to analyze SEO? Google Search Console, Google Analytics, and PageSpeed Insights.
8. Is Blogger suitable for a professional blog? For small to medium projects, yes. For advanced needs, prefer WordPress.
9. Do images affect SEO? Yes, optimize them with descriptive filenames and alt attributes.
10. Are Blogger templates SEO-friendly? Some are, but always test for speed and mobile compatibility.
We have received several reports of problems with the Godaddy domain connected to Blogger. In this article we will see how to solve the problems between domain with www and without www on Blogger and GoDaddy in a simple and definitive way.
One of the most common problems for people connecting a custom domain to Blogger through a provider like GoDaddy is whether the site will work with and without www .
Often, in fact, you notice that the site opens perfectly with www , but that typing it without www shows a parking page, often from GoDaddy . In this article we analyze why this happens, how DNS configuration works and what you need to do to solve this annoying situation once and for all.
How www and non-www work
When you purchase a custom domain (e.g. yoursite.com ) and connect it to a platform like Blogger , it is important to know that www.yoursite.com and yoursite.com are considered two separate subdomains. The first is the so-called www subdomain , while the second is the naked domain . Both must be configured separately if you want them to lead to the same website.
Many users only set up the www subdomain on Blogger , leaving the domain bare with no clear instructions on where to point. This is why, when visiting yoursite.com , you are redirected to the typical parking page of GoDaddy , the domain provider.
The Role of DNS Records
To fix this, you need to work on your domain’s DNS records , which are the settings that tell browsers where to go when someone types in a certain address. In particular, it’s critical to add the correct A records to make your domain work without www .
Blogger uses four IP addresses to manage naked domains, which must be entered into the DNS panel of the provider (in this case, GoDaddy ). If these IPs are not present, the naked domain has nowhere to go and relies on GoDaddy’s default setting, which parks it.
Click on the custom domain section ( www.tuosito.com)
Activate the item: “Redirect yoursite.com to www.yoursite.com”
4. Wait for DNS propagation
It may take from a few minutes up to a few hours (max 24h) to see the effect.
In the end, what happens?
Visitor types tuosito.com → A records take him to Blogger → Blogger automatically redirects towww.tuosito.com
The Importance of Redirecting on Blogger
Once you have properly configured your DNS records, it is essential to go into your Blogger settings and enable automatic redirection from your bare domain to www . This option, available in the “Publishing” section, ensures that anyone who types yoursite.com is automatically sent to www.yoursite.com , thus ensuring a consistent user experience and also improving your SEO positioning.
Without this setting, even with the correct DNS records, Blogger will not know how to handle traffic going to the non- www domain , causing errors or unpredictable behavior.
DNS Propagation and Wait Times
Once you have made all the changes, do not expect an immediate result. DNS changes take time to propagate across the Internet. Typically, it can take from a few minutes to 24 hours. It is normal for the site to continue to behave strangely in the meantime. The only thing to do is to be patient and check from time to time that everything is working as expected.
Frequently Asked Questions (FAQ)
1. Why does my site only work with www? Because you have only the www subdomain configured in DNS and not the naked domain.
2. What does naked domain mean? It is the domain without the www prefix, for example yoursite.com.
3. Where do I enter the A records for Blogger? In your provider’s DNS panel, in this case GoDaddy.
4. What are Blogger’s A records? 216.239.32.21, 216.239.34.21, 216.239.36.21, and 216.239.38.21.
5. What happens if I don’t set up a naked domain? The domain points to the GoDaddy parking page or shows an error.
6. Should I delete other existing A records? Yes, if there are A records pointing to other IPs, they should be removed.
7. Do I need to set up redirects on Blogger? Absolutely, to avoid duplicate content and SEO issues.
8. How long does it take for DNS changes to take effect? Up to 24 hours, but usually a few hours is enough.
9. Do I need a separate SSL certificate for my naked domain? No, Blogger handles this automatically once it’s configured correctly.
10. Can I just use the bare domain without www? Technically yes, but with Blogger it is recommended to always use www.
A client of ours to whom we provide SEO services has specifically asked to use a certain suite of programs for SEO analysis. However, Semrush is not among them. He also noticed in the file Logs that the Semrush bit punctually returns to show itself, a sign that his competitors study it. The shared decision was to exclude the Semrush bot from the website. But let’s clarify a bit.
If you manage a website, you’ve probably noticed various bots crawling your pages in your server logs. One of the most active is SemrushBot, used by the popular SEO tool Semrush. But what exactly does it do? And should you block SemrushBot to protect your site or improve your SEO strategy?
In this article, we’ll explore what the Semrush bot does, why you might want to block it, and how to do so effectively using practical methods and code snippets.
SemrushBot is a web crawler used by Semrush, one of the most popular SEO platforms. Its primary function is SemrushBot is the official crawler of Semrush, one of the most powerful SEO platforms used for website analysis and data collection. Its main purpose is to gather information about web pages, which is then used for various SEO functions, such as backlink analysis, keyword tracking, and technical audits.
Let’s take a closer look at how it works and the types of data it collects.
1. Backlink Profile Analysis
One of the primary functions of SemrushBot is scanning websites to track backlinks, which are links from other sites pointing to yours. Backlinks are a crucial ranking factor in SEO off-page strategies, helping search engines determine a site’s credibility.
Example:
If your website receives a backlink from an authoritative blog in your industry, SemrushBot will crawl both pages (the blog and your site) to detect and register the link. This information then becomes available to Semrush users, allowing them to:
Identify which sites are linking to a domain
Analyze the quality and authority of backlinks
Monitor new and lost backlinks
See which anchor texts are used
For instance, if you run an e-commerce store selling running shoes and receive a backlink from Runner’s World, SemrushBot will detect it and list it in Semrush’s backlink analysis tool.
Why could this be a problem? If you want to keep your SEO strategy private, blocking SemrushBot might be necessary to prevent competitors from discovering your best backlinks.
2. Identifying Organic Keywords
SemrushBot collects data on the keywords your site ranks for in search engines. It does this by scanning your page content and monitoring your positions on Google.
Example:
Let’s say you run a blog about vegan nutrition, and one of your articles ranks well for the keyword “best vegan recipes”. SemrushBot will analyze your page’s content, headings, and structure to determine:
What keywords appear in your content
How your page is optimized
Its ranking position on Google
This data is then used in Semrush’s Keyword Research tools, allowing users to see which keywords drive traffic to a site.
Why could this be a problem? If your competitors use Semrush, they can easily discover your most valuable keywords and optimize their own content to outrank you.
3. Monitoring SEO Performance
SemrushBot also collects information on SEO on-page elements, such as:
Page loading speed
Title tags and meta descriptions
Heading structure (H1, H2, H3, etc.)
Mobile optimization
Example:
If a page on your website loads slowly, SemrushBot can detect this and report it in Semrush’s Site Audit tool, signaling that your site may have performance issues.
Another example: If a page is missing a meta description, SemrushBot will flag it as an issue, making it visible to users on Semrush.
Why could this be a problem? If you don’t want your SEO weaknesses to be publicly available on Semrush, blocking SemrushBot may be a good idea.
4. Detecting Technical SEO Issues
SemrushBot also performs technical audits, identifying SEO errors that could impact your ranking, such as:
404 errors (broken pages)
Redirect issues
Duplicate content
Robots.txt errors
HTTPS misconfigurations
Example:
If your website has many 404 errors, SemrushBot will detect them and list them in Semrush’s Site Audit tool. While this can help webmasters fix issues, it also makes all your technical flaws visible to other Semrush users.
Why could this be a problem? If you prefer to keep your site’s technical status private, you might want to block SemrushBot from crawling your pages.
Why Block the Semrush Bot?
There are several reasons why you might want to block SemrushBot from crawling your site:
1. Protecting Your SEO Strategy
If you want to keep your SEO tactics, backlinks, and keyword strategy hidden from competitors, preventing SemrushBot from collecting this data is a smart move.
2. Reducing Server Load
Every bot that crawls your site consumes server resources. If your site has many pages and gets scanned by various bots, your server performance might suffer. Blocking SemrushBot can help reduce unnecessary requests.
3. Controlling Public Information
Not all site owners want their data freely accessible in SEO tools. Blocking SemrushBot ensures that your competitors won’t see your website’s detailed SEO insights.
4. Avoiding Indexing Issues
Some webmasters report that excessive crawling by SEO bots can interfere with search engine indexing. While this isn’t always a problem, limiting unnecessary bot traffic can help improve overall site performance.
How to Block the Semrush Bot
There are several methods to block SemrushBot from accessing your website. Below are the most effective ways to do so.
1. Block SemrushBot via robots.txt
The simplest way to tell SemrushBot not to crawl your website is by adding these lines to your robots.txt file:
User-agent: SemrushBot
Disallow: /
This tells SemrushBot not to scan any pages on your site. However, robots.txt is just a request, and some bots may ignore it.
2. Block SemrushBot via .htaccess (Apache Servers)
If your website runs on Apache, you can prevent SemrushBot from accessing it using .htaccess:
RewriteEngine On
RewriteCond %{HTTP_USER_AGENT} SemrushBot [NC]
RewriteRule .* - [F,L]
This will return a 403 Forbidden error whenever SemrushBot tries to crawl your site.
3. Block SemrushBot with Nginx
If you use an Nginx server, add this rule to your nginx.conf file:
if ($http_user_agent ~* "SemrushBot") {
    return 403;
}
This will block all requests coming from SemrushBot and return a 403 Forbidden error.
4. Firewall Blocking (Advanced Users)
If you have access to your server’s firewall, you can block SemrushBot using iptables:
iptables -A INPUT -p tcp --dport 80 -m string --algo bm --string "SemrushBot" -j DROP
This command ensures that requests from SemrushBot are dropped before reaching your site.
5. Blocking SemrushBot via Cloudflare
If your website is protected by Cloudflare, you can block SemrushBot using firewall rules in your Cloudflare dashboard:
Go to Cloudflare Dashboard
Navigate to Security > WAF (Firewall Rules)
Create a new rule:
If User-Agent contains SemrushBot
Action: Block
This method prevents the bot from accessing your site while keeping your server load low.
Is Blocking SemrushBot Necessary?
Before blocking SemrushBot, consider your specific needs. If you’re concerned about competitor analysis or server resources, blocking the bot makes sense. However, if you use Semrush for your own SEO, blocking it may prevent you from gathering useful insights about your site.
Each website has different priorities, so the decision to block SemrushBot depends on your goals. If you do choose to block it, make sure you use the most effective method for your setup.
FAQ
1. What is SemrushBot?
SemrushBot is Semrush’s web crawler that scans websites for SEO analysis, including backlinks, keywords, and technical performance.
2. Does blocking SemrushBot affect SEO rankings?
No, blocking SemrushBot does not impact your search engine rankings. It only prevents Semrush from collecting data on your site.
3. How can I check if SemrushBot is crawling my site?
You can check your server logs or use tools like Google Search Console to monitor bot activity.
4. Does robots.txt fully block SemrushBot?
No, robots.txt is just a guideline. For a guaranteed block, use .htaccess, firewall rules, or Cloudflare.
5. What’s the best way to block SemrushBot?
The most effective method is blocking SemrushBot via .htaccess or firewall rules, as they prevent direct access.
6. Will my competitors still see my site on Semrush if I block the bot?
No, if SemrushBot is blocked, Semrush will not be able to display data about your site in its tool.
7. Can blocking SemrushBot reduce server load?
Yes, fewer bot requests mean lower server resource usage, improving performance.
8. Does SemrushBot ignore robots.txt?
Typically, SemrushBot respects robots.txt, but some crawlers might still access your site.
9. Can I block only specific pages instead of the whole site?
Yes, you can restrict SemrushBot from crawling specific URLs using robots.txt or server rules.
10. Is it legal to block SemrushBot?
Yes, website owners have the right to control bot access to their sites.
Typosquatting is a pervasive threat in the digital landscape, exploiting simple errori di ortografia to deceive users and compromise sicurezza informatica (cybersecurity). By understanding cos’è il typosquatting and implementing preventive measures, both individuals and businesses can protect themselves from this insidious practice. Stay vigilant, double-check URLs, and leverage security tools to ensure a safer online experience.
Typosquatting is a deceptive practice that preys on human error. Imagine typing a website address quickly and making a small typo—only to be redirected to a malicious site. This is typosquatting, also known as URL hijacking, a form of cybersquatting that exploits typos or spelling errors to reindirizzare gli utenti (redirect users) to fraudulent siti web. This article dives deep into cos’è il typosquatting, how it works, and how you can protect yourself and your organization from falling victim to this cyber threat.
What is Typosquatting?
Typosquatting, or URL hijacking, is a malicious practice where cybercriminals registrano domini(register domains) that are nearly identical to popular websites but contain slight errori di ortografia(spelling errors) or variations. These domini simili (similar domains) are designed to trick users who accidentally mistype a URL into visiting a fraudulent site instead of the intended one.
For example, if you meant to visit “example.com” but typed “exmaple.com,” you could end up on a typosquat site. These sites often mimic the appearance of the legitimate site, using loghi simili (similar logos) and simile struttura (similar structure), to deceive users into believing they are on the correct site.
How Typosquatting Works
Typosquatting is a sneaky technique that exploits common human errors to redirect users to fraudulent websites. These errors can take various forms, and cybercriminals use them to register domini simili (similar domains) that mimic popular websites. Here are some concrete examples of how typosquatting works:
1. Typographical Errors
One of the most common mistakes is a simple typo while typing a URL. For example, instead of typing “google.com,” a user might accidentally type “gogle.com” (missing an “o”). A typosquatter could have registered “gogle.com” to redirect traffic to a malicious site.
Practical Example:
Legitimate domain: google.com
Typosquat domain: gogle.com
This fraudulent domain might host a phishing site that mimics Google’s login page, attempting to steal users’ credentials.
2. Spelling Errors
Sometimes, spelling errors occur due to the difficulty of correctly spelling complex or foreign words. For example, instead of “facebook.com,” a user might type “facebok.com” (missing an “e”).
Practical Example:
Legitimate domain: facebook.com
Typosquat domain: facebok.com
This domain could be used to redirect users to a site that collects personal data or spreads malware.
3. Pluralization
Another common tactic is pluralizing the domain name. For example, instead of visiting “example.com,” a user might type “examples.com.”
Practical Example:
Legitimate domain: example.com
Typosquat domain: examples.com
This domain could be used to display intrusive ads or redirect traffic to a competitor.
4. Different Top-Level Domains (TLDs)
Typosquatters often register domains with different top-level domains (TLDs) than the original. For example, instead of “example.com,” they might use “example.org” or “example.net.”
Practical Example:
Legitimate domain: example.com
Typosquat domain: example.org
These domains could be used to redirect users to phishing sites or generate ad revenue.
What happens when a user falls for the trap?
Once a user lands on a typosquat site, the consequences can vary:
Phishing: The site might mimic the appearance of the legitimate site, asking the user to enter sensitive information such as login credentials, credit card numbers, or other personal data.
Malware: The site might attempt to install malware on the user’s device, compromising their security.
Intrusive Ads: The site could display aggressive advertisements, generating revenue for the typosquatter.
Redirection: The user might be redirected to another site, often malicious or competitive.
Example of code to redirect users
A typosquatter might use a simple script to redirect users to a malicious site. Here’s an example of HTML and JavaScript code that could be used:
html
<!DOCTYPE html>
<html lang="en">
<head>
    <meta charset="UTF-8">
    <title>Welcome to Example.com</title>
    <script type="text/javascript">
        // Redirect the user after 3 seconds
        setTimeout(function() {
            window.location.href = "https://malicious-site.com";
        }, 3000);
    </script>
</head>
<body>
    <h1>You are being redirected...</h1>
    <p>If you are not redirected automatically, <a href="https://malicious-site.com">click here</a>.</p>
</body>
</html>
In this example, the user is automatically redirected after 3 seconds to a malicious site. During this time, the site might display a deceptive message to make the user believe they are in the right place.
How to protect from Typosquatting
Verify the URL: Before entering sensitive information, always check the URL to ensure it is correct.
Use Bookmarks: Save frequently visited websites in your favorites to avoid typing errors.
Install Security Extensions: Some web browsers offer extensions that warn users of potential phishing or typosquat sites.
Education and Awareness: Inform friends, family, and colleagues about the risks of typosquatting and how to recognize it.
Detecting Typosquatting with Python
To identify typosquatting domains, we can write a Python script that:
Generates domain variations based on common misspellings.
Checks if these domains are registered using WHOIS or DNS queries.
Alerts the user if a typosquatting domain is active.
Python Code for Typosquatting Detection
python
import itertools
import requests
import whois

# Generate common typosquatting variants
def generate_typosquatting_domains(domain):
    typo_variants = []

    # Common misspellings
    typo_variants.append(domain.replace("o", "0"))  # amazon -> amaz0n
    typo_variants.append(domain.replace("i", "1"))  # linkedin -> l1nkedin
    typo_variants.append(domain.replace("e", "3"))  # google -> googl3
    typo_variants.append(domain + ".net")  # Different TLD
    typo_variants.append(domain[:-1])  # Missing last character (twitter -> twitte)

    return typo_variants

# Check if a domain exists using WHOIS
def check_domain(domain):
    try:
        whois.whois(domain)  # Query WHOIS database
        return True  # Domain exists
    except:
        return False  # Domain is not registered

# Scan for typosquatting risks
def check_typosquatting_domains(original_domain):
    typo_domains = generate_typosquatting_domains(original_domain)

    print(f"Checking for possible typosquatting domains related to {original_domain}...\n")

    for domain in typo_domains:
        full_domain = domain if domain.startswith("http") else f"http://{domain}"
        exists = check_domain(domain)

        if exists:
            print(f"[⚠️ ALERT] Typosquatting domain detected: {domain}")
        else:
            print(f"[✔ SAFE] No typosquatting detected for: {domain}")

# Run script for a given domain
original_website = "amazon.com"
check_typosquatting_domains(original_website)
How the Code Works
generate_typosquatting_domains(domain): Creates variations of the original domain based on common typing mistakes.
check_domain(domain): Uses WHOIS lookup to verify if the domain is already registered.
check_typosquatting_domains(original_domain): Scans multiple domains and alerts the user if any risky typosquatting domains exist.
Example output
If we run the script for amazon.com, the output might look like this:
less
Checking for possible typosquatting domains related to amazon.com...

[⚠️ ALERT] Typosquatting domain detected: amaz0n.com

[✔ SAFE] No typosquatting detected for: amazn.com

[⚠️ ALERT] Typosquatting domain detected: amazon.net

[✔ SAFE] No typosquatting detected for: amaz0n.net

[✔ SAFE] No typosquatting detected for: amazo.com
The risks of Typosquatting
The dangers of typosquatting are significant. Users may unknowingly provide dati personali to malicious actors, leading to identity theft or financial loss. Businesses also face risks, as typosquattingcan damage their reputation and lead to a loss of customer trust.Moreover, typosquatting can be used to reindirizza il traffico (redirect traffic) from legitimate sites to competitors or malicious platforms. This not only harms the original site’s traffic but can also result in legal and financial complications.
How to prevent Typosquatting
Preventing typosquatting requires a combination of awareness and proactive measures. Here are some strategies to protect yourself and your organization:
Register Similar Domains: Businesses should registrano domini that are common misspellings or variations of their primary domain. This prevents cybercriminals from exploiting these variations.
Use SSL Certificates: Ensure your site uses certificati SSL to establish trust and security. This helps users verify they are on the legitimate site.
Educate Users: Train employees and customers to double-check URLs before entering informazioni sensibili. Encourage them to bookmark trusted sites to avoid typos.
Monitor for Abusive Registrations: Regularly check for domini simili that could be used for occupazioni abusive (abusive registrations). Tools like domain monitoring services can help identify potential threats.
Leverage Web Browser Security: Modern web browsers often include features to warn users about suspicious sites. Ensure these features are enabled.
Report Typosquatting: If you discover a typosquat site, report it to the domain registrar or relevant authorities to have it taken down.
FAQs about Typosquatting
What is typosquatting? Typosquatting is a cyber threat where attackers register domains with errori di ortografia to trick users into visiting fraudulent sites.
How does typosquatting work? It exploits common typing errors to reindirizzare gli utenti to malicious sites that mimic legitimate ones.
What are the risks of typosquatting? Risks include phishing, data theft, and damage to a brand’s reputation.
How can businesses prevent typosquatting? By registering similar domains, using certificati SSL, and monitoring for domini simili.
Can typosquatting affect individuals? Yes, individuals can fall victim to phishing or malware through typosquat sites.
What are common typosquatting techniques? Techniques include misspelled domains, pluralizations, and different top-level domains.
How do I know if I’m on a typosquat site? Look for subtle differences in the URL, lack of certificati SSL, or unusual site behavior.
Can typosquatting be reported? Yes, report abusive domains to the registrar or cybersecurity authorities.
Are social media platforms targeted by typosquatting? Yes, social media sites are often mimicked due to their popularity.
Is typosquatting illegal? Yes, typosquatting is considered a form of cybercrime and is illegal in many jurisdictions.
Google has announced that all reCAPTCHA keys must be migrated to a Google Cloud project by the end of 2025. This move will unify all reCAPTCHA customers under a single set of terms and a consistent pricing structure, while providing access to advanced security features. If you use reCAPTCHA to protect your website, it’s essential to understand how to prepare for this transition.
What Changes for You
The migration to Google Cloud will not only simplify reCAPTCHA key management but also unlock more sophisticated tools. Key updates include:
Enterprise-level dashboard for activity monitoring.
Advanced monitoring and reporting.
Integrated logging and auditing.
More granular access control.
Additionally, your monthly reCAPTCHA usage will be subject to a new billing structure. If you exceed 10,000 monthly assessments, additional charges may apply. You can use Google’s pricing calculatorto estimate future costs.
What You Need to Do
Google will roll out the change in phases throughout the year, notifying you via email when your keys are eligible for migration. At that point, a Google Cloud project will be automatically created, and your keys will be associated with it.
However, you can proactively migrate from reCAPTCHA Classic by following the provided instructions. This will allow you to choose the Google Cloud project for your key and immediately unlock new features.
Important note: No code changes are required for your current integration. You can continue using the legacy SiteVerify API endpoint, but we recommend switching to the CreateAssessment endpoint to access the latest reCAPTCHA features.
Support and Resources
Google understands that this change will require careful planning. For assistance, you can contact Google Cloud support or join the Google Cloud community. Additionally, the reCAPTCHA blog offers regular updates and technical details to guide you through the process.
How to Perform the Migration
The migration is a straightforward process that takes only 5-10 minutes. Here are the main steps:
Select or create a Google Cloud project in the console.
Enable billing for the project.
Activate the reCAPTCHA Enterprise API.
Migrate your site key using the Google Cloud console, Cloud Shell, gcloud CLI, or REST API.
Once the migration is complete, you can continue using your keys without interruption, but with access to advanced features like Account Defender and Password Leak Detection.
How to Migrate from reCAPTCHA Classic to Google Cloud
A Step-by-Step Guide for a Smooth Transition
Migrating your reCAPTCHA keys to Google Cloud is a straightforward yet crucial process to ensure access to the latest security features and more efficient management. Here’s a detailed guide to help you complete the migration quickly and securely.
1. Initial Preparation
Before starting, make sure you have everything you need to perform the migration:
An active Google Cloud account.
Billing enabled for your Google Cloud project.
Access to the reCAPTCHA Admin Console to manage existing keys.
If you don’t already have a Google Cloud project, you can create one directly from the console. Ensure that billing is activated, as it is a fundamental requirement for migration.
2. Enabling the reCAPTCHA Enterprise API
All reCAPTCHA keys, regardless of the tier (Essentials, Standard, or Enterprise), are managed through the reCAPTCHA Enterprise API. Here’s how to enable it:
Log in to the Google Cloud Console.
Go to the APIs & Services page.
Search for and select reCAPTCHA Enterprise API.
Click Enable.
Once the API is enabled, you’re ready to proceed with the key migration.
3. Selecting the Key to Migrate
From the reCAPTCHA Admin Console, select the site key you want to migrate. Supported keys for migration include:
reCAPTCHA v2 (Checkbox)
reCAPTCHA v2 (Invisible)
reCAPTCHA v3
Copy the site key, as you’ll need it to complete the migration process.
4. Performing the Migration
You can perform the migration using various tools: the Google Cloud Console, Cloud Shell, the gcloud CLI, or the REST API. Here’s how to proceed with each method:
Google Cloud Console
Go to the reCAPTCHA Enterprise page in the console.
Select the Google Cloud project you want to associate the key with.
Click Migrate Key and paste the site key you copied earlier.
Cloud Shell or gcloud CLI
If you prefer using the command line, run the following command:
Replace PROJECT_ID with your Google Cloud project ID and SITE_KEY with the site key you’re migrating.
REST API
If you’re using the REST API, send a POST request to the endpoint:
POST https://recaptchaenterprise.googleapis.com/v1/projects/PROJECT_ID/keys/SITE_KEY:migrate
Include the authorization header and an empty request body.
5. Verifying the Migration
After completing the migration, verify that the key has been correctly associated with the Google Cloud project:
Go to the reCAPTCHA Enterprise page in the console.
Look for the migrated key in the reCAPTCHA Keys section.
Check that the settings and features have been transferred correctly.
6. What Happens After Migration
Once the key is migrated, you can continue using the SiteVerify endpoint to evaluate reCAPTCHA tokens. However, to fully leverage new features like Account Defender or Password Leak Detection, you’ll need to switch to the CreateAssessment endpoint.
Note: You don’t need to delete keys from the reCAPTCHA Admin Console. Migrated keys will remain active in both consoles until you manually remove them.
7. Managing Costs
After migration, your reCAPTCHA usage will be subject to a new billing structure. If you exceed the free monthly quota of 10,000 assessments, additional charges will apply. Use Google’s pricing calculatorto estimate costs based on your usage.
8. Support and Additional Resources
If you encounter difficulties during the migration, you can contact Google Cloud Support or consult the official documentation. Additionally, the Google Cloud Community is an excellent resource for sharing experiences and solving common issues.
The migration to Google Cloud is a significant step toward improving the security and efficiency of your reCAPTCHA integrations. While the process is simple, it’s crucial to start planning now to avoid last-minute surprises.
Have questions or concerns? Leave a comment in the form below and share your thoughts on this reCAPTCHA evolution.
error: Content is protected !!
Gestisci Consenso
Per fornire le migliori esperienze, utilizziamo tecnologie come i cookie per memorizzare e/o accedere alle informazioni del dispositivo. Il consenso a queste tecnologie ci permetterà di elaborare dati come il comportamento di navigazione o ID unici su questo sito. Non acconsentire o ritirare il consenso può influire negativamente su alcune caratteristiche e funzioni.
Funzionale
Always active
L'archiviazione tecnica o l'accesso sono strettamente necessari al fine legittimo di consentire l'uso di un servizio specifico esplicitamente richiesto dall'abbonato o dall'utente, o al solo scopo di effettuare la trasmissione di una comunicazione su una rete di comunicazione elettronica.
Preferenze
L'archiviazione tecnica o l'accesso sono necessari per lo scopo legittimo di memorizzare le preferenze che non sono richieste dall'abbonato o dall'utente.
Statistiche
L'archiviazione tecnica o l'accesso che viene utilizzato esclusivamente per scopi statistici.L'archiviazione tecnica o l'accesso che viene utilizzato esclusivamente per scopi statistici anonimi. Senza un mandato di comparizione, una conformità volontaria da parte del vostro Fornitore di Servizi Internet, o ulteriori registrazioni da parte di terzi, le informazioni memorizzate o recuperate per questo scopo da sole non possono di solito essere utilizzate per l'identificazione.
Marketing
L'archiviazione tecnica o l'accesso sono necessari per creare profili di utenti per inviare pubblicità, o per tracciare l'utente su un sito web o su diversi siti web per scopi di marketing simili.